0 Cart
Added to Cart
    You have items in your cart
    You have 1 item in your cart
    Total
    Check Out Continue Shopping

    Resources

    3rd Generation Toyota Tacoma DIY Maintenance Reference Guide

    3rd Generation Toyota Tacoma DIY Maintenance Reference Guide

    It’s always fun and generally cheaper to do work on your truck yourself. Sometimes you may know how to do the job, but need some vehicle specific details and quick tips. That’s where this guide comes in.

    Keep in mind that if you are not completely confident or sure about what you are doing, you could always cause some extreme damage to your Tacoma. It’s best to take your truck to a mechanic in those situations, but if you want to tinker, here's some helpful information and here's three tools that will come in handy for almost all of the maintenance you will be doing:

    Inspecting and Adjusting Fluid Levels

    Engine Oil (0W-20 ILSAC GF-5 oil - Toyota part # 00279-0WQTE-01)

    1. Check with the engine warm, over 5 minutes after shutting off engine
    2. Tip: Leave the dipstick out while waiting 5 minutes to allow the oil in the dipstick tube to drain back down. It makes it easier to read.
    3. Per manual, it’s 1.6 quarts from the low mark to the full mark. Don’t overfill your oil!

    Coolant (Toyota SLLC - Toyota part # 00272-SLLC2, 50/50 pre-diluted, Canada is 55/45)

    1. Between LOW and FULL lines with the engine cold

    Brake Fluid (FMVSS No. 116 DOT 3 or SAE J1703)

    1. Between MIN and MAX (should be near or at max with fresh pads)

     Power Steering Fluid (Automatic transmission fluid DEXRON® II or III)

    1. Between min and max (cold and hot lines provided)
    2. Cold - Not driven in the last 5 hours (50-85 degrees Fahrenheit fluid temp)
    3. Hot - Driven 50 MPH for 20 minutes (140-175 degrees Fahrenheit fluid temp)
    Clutch Fluid (FMVSS No. 116 DOT 3 or SAE J1703)

    Rotating Tires

    • Tires should be rotated every 5,000 miles or 6 months.
    • Front to back or back to front on each side
    • Lug nut torque - 83 lb-ft (21mm)
    • Check torque after about 1000 miles after rotating

    Replacing Engine Oil and Filter

    If you want a complete guide, we have one on how to change the oil on a third generation Toyota Tacoma.

    Assuming you are using synthetic oil, replace it every 10,000 miles or 12 months. Severe use might be every 5,000 miles or 6 months.

    Torque specs:

    • Oil pan drain plug - 30 lb-ft (14mm)
    • Oil filter cap - 216 lb-in/18 lb-ft (TOY640 with 15/16" or 24mm socket)
    • Oil filter drain plug - 120 lb-in/10 lb-ft (3/8" square drive)
    • No. 1 engine under cover sub-assembly - 22 lb-ft (12mm)
    • No. 2 engine under cover sub-assembly (off-roads) - 22 lb-ft (12mm)

    Parts:

    • Oil - 6.1-6.2 qts 0W-20 ILSAC GF-5 oil - Toyota part # 00279-0WQTE-01
    • Oil pan drain plug gasket - Toyota part # 90430-12031
    • Oil filter element kit - Toyota part # 04152-YZZA1

    Special tools:

    Tips:

    1. Requires removing skid(s) for access.
    2. The oil filter has a permanent housing. The oil filter element kit includes new filter cartridge, two new gaskets, and the temporary oil filter drain pipe.
    3. The hose for the oil filter drain pipe (if used) should be 5/8” ID (15 mm). You can find it at your local hardware store’s plumbing section for around one dollar.
    4. Proper torque of the oil filter cap and oil filter drain plug should help prevent the cap coming off before the drain plug on the next change, which can be a lot cleaner.
    5. When you remove the filter drain plug, give it a little impact. If you're too smooth, the plug and housing will try and move together.

    Lubricate Propeller Shaft 

    You should do this every 15,000 miles or 18 months. If it’s severe, it should be every 5,000 miles or 6 months.

    Parts:

    Special tools:

    Tips:

    1. Spiders should be greased until fresh grease purges from all four seals. They should purge somewhat evenly. If they don’t, there may be a problem.
    2. I would not attempt to lube the center support bearing. I suspect it is sealed and is meant never to be self-serviced.
    3. Only four-wheels-drives have zerk fittings. You won't find any on a two-wheel-drives.

    Re-Torque Propeller Shaft Bolts

    You should do this every 15,000 miles or 18 months. If severe, try every 5,000 miles or 6 months.

    Torque specs:

    • U-joint bolts - 65 lb-ft (14mm/17mm)
    • Center support bearing - 27 lb-ft (Be careful with this. If it was loose, it may need realignment)

    Tips:

    1. You will need a 14mm and 17mm box ends or flarenuts for the u-joint flanges. Sockets will not fit.
    2. The flanges at the transfer case have a 17mm bolt head with a 14mm nut.
    3. Flanges at the diffs have a 14mm bolt with a 14mm nut.
    4. I recommend a box-end or flarenut crowfoot on your torque wrench, but don't forget to lower your torque setting due to the longer torque arm. Here's a calculator on how to do that: http://www.cncexpo.com/TorqueAdapter.aspx
    5. You will have to remove the heat shield at rear of the transfer case (12mm)

    Re-Torque Leaf Spring U-bolts

    Torque spec:

    • 52 lb-ft (19mm)

    Replace Cabin Air Filter

    You should do this every 20,000 miles or 24 months.

    Parts:

    • Filter - Toyota part # 88508-01010

    Tips:

    1. If you don't know how to do this, you can find it in your owner’s manual.

    Replace Engine Air Filter

    This should be done every 20,000 miles or 24 months.

    Parts:

    • Filter - Toyota part # 17801-0P100

    Tips:

    1. This is an easy job, but you don't want to mess it up. Make sure there are no holes or tears in your new filter. Make sure everything is clean before you open up the box and remove filter. Also, make sure you have a good mating/seal around entire edge of the filter. Gaps could let dirt in past your filter and into your engine.

    Front Brakes

    You should visually inspect them every 5,000 miles or 6 months and measure them every 30,000 miles or 36 months.

    Torque specs:

    • Brake caliper mounting bolts - 91 lb-ft 

    Service Specs:

    • Pad min thickness: 1.0 mm
    • Rotor min thickness: 26.0 mm
    • Max rotor runout: 0.05 mm

    Parts:

    • Rotors - Toyota part # 43512-04052
    • Pads - Toyota part # 04465-04090

    Tips:

    1. Measure the runout 10 mm from outer edge of the rotor; the rotor should be installed with all six lug nuts torqued to 83 lb-ft when you’re checking.
    2. If the runout is beyond the maximum limit, check the bearing play and axle hub runout is normal before replacing the rotors.
    3. If the rotor is stuck on the hub, use an M8-1.25 bolt in the holes on the rotors to break it free.
    4. Install new rotors in a position with the least amount of runout.

    Rear Brakes

    You should visually inspect them every 5,000 miles or 6 months and measure them every 30,000 miles or 36 months.

    Service specs:

    • Drum max diameter - 10.08 in
    • Shoe min thickness - 1.0 mm

    Replace Differential Oil

    Inspect your rear diff every 15,000 miles or 18 months. If severe, replace the oil every 15,000 miles or 18 months.

    Torque specs:

    • Rear diff drain plug - 36 lb-ft (24mm or 15/16")
    • Rear diff fill plug - 36 lb-ft (24mm or 15/16")
    • Front diff drain plug - 48 lb-ft (10mm hex)
    • Front diff fill plug - 29 lb-ft (10mm hex)
    • No. 2 engine under cover assembly - 22 lb-ft (12mm)

    Parts:

    • Toyota Genuine Differential gear oil LT 75W-85 GL-5 or equivalent - Toyota part # 08885-02506
    • Front - 1.6 qts; Rear - 3.1-4.2 qts (varies with model)
    • Rear drain plug gasket - Toyota part # 12157-10010
    • Rear fill plug gasket - Toyota part # 12157-10010
    • Front drain plug gasket - Toyota part # 90430-24003
    • Front fill plug gasket - Toyota part # 12157-10010


    Tips:

    1. Perform while your vehicle is level
    2. Ensure you can remove the fill plug before draining
    3. Proper level should be within 5 mm of bottom of fill plug opening
    4. Re-check the level after driving
    5. Save the new fill plug washer until the final check
    6. You will need to remove the skid plate and may need a bottle pump for front
    7. Gasket kit for transfer and differential
    8. Here is a good guide on how to replace your differential fluid in a 3rd generation Tacoma

    Replace Transfer Case Oil

    Inspect your transfer case every 30,000 miles or 36 months. If severe, replace the oil every 30,000 miles or 36 months.

    Torque specs:

    • Drain plug - 27 lb-ft (24mm or 15/16")
    • Fill plug - 27 lb-ft (24mm or 15/16")

    Parts:

    • 1.1 qts SAE 75W Toyota Genuine Transfer gear oil LF or equivalent - Toyota part # 08885-81080
    • Drain plug gasket - Toyota part # 90430-A0003
    • Fill plug gasket - Toyota part # 90430-A0003

    Tips:

    1. Ensure you can remove the fill plug before draining
    2. After filling, leave the plug out and let sit for about five minutes and recheck. Add more fluid if necessary.
    3. Rear Diff and Transfer Case Gasket Kit

    Manual Transmission Oil

    Visually inspect the oil every 30,000 miles or 36 months. If it’s severe, replace it every 30,000 miles or 36 months.

    Torque specs:

    • Drain plug - 27 lb-ft (24mm or 15/16")
    • Fill plug - 27 lb-ft (24mm or 15/16")

    Parts:

    • Toyota Genuine Manual Transmission Gear Oil GL-3 (GL-4) or equivalent, SAE 75W-90
    • 4 cyl - 2.3 qts, 6 cyl - 2.6 qts
    • Drain plug gasket
    • Fill plug gasket

    Tips:

    1. Perform while your vehicle is level
    2. Ensure you can remove the fill plug before draining
    3. Proper level should be within 5 mm of bottom of fill plug opening
    4. Here is a good article on how to replace the manual transmission oil in a 3rd generation Tacoma

    Replace Automatic Transmission Fluid 

    Visually inspect the oil every 30,000 miles or 36 months. If it’s severe, replace it every 60,000 miles or 72 months.

    Torque specs:

    • Drain plug - 180 lb-in/15 lb-ft (14mm)
    • Overflow plug - 180 lb-in/15 lb-ft (5mm hex)
    • Fill plug - 29 lb-ft (24mm or 15/16")

    Parts:

    • Toyota ATF WS fluid - Toyota part # 00289-ATFWS
    • Drain plug gasket - Toyota part # 35178-30010
    • Overflow plug gasket - Toyota part # 35178-30010
    • Fill plug gasket - Toyota part # 90301-15004

    Special tools:

    • Toyota SST 09843-18040 (basically, you just need a wire to jumper two OBD ports)
    • Bottle pump (to use for filling)

    Tips:

    1. Here is a good reference article
    2. The quantity of fluid will depend on what you do. Per the TIS repair manual, it directs three drain/refill/circulates for a replacement, so it will probably be somewhere between 10-12 quarts.

    Replace Engine Coolant

    Inspect the coolant every 15,000 miles or 18 months. You should replace it at 100,000 miles or 120 months, and then every 50,000 miles or 60 months thereafter.

    Parts:

    • 9.1-11.1 qts Toyota SLLC - Toyota part # 00272-SLLC2 (50/50 pre-diluted, Canada is 55/45). The quantity depends on the model. Consult your manual.

    Tips:

    1. Be careful. There is a special sequence to fill the system and remove all the voids without damaging or overheating anything.

    Working on your truck can be a satisfying feeling. Sometimes things can be easy, and sometimes they are not. It is always best to take your truck to a mechanic in the event you are unsure of what you are doing. One wrong mistake could cost you thousands to repair. However, if you do know what you are doing, hopefully these numbers and tips help you with the most important aspect of vehicle ownership: maintenance.

    * Please note that some of these links are Amazon affiliate links and we make a small commission if you purchase the product.

    10 Awesome Toyota Tacoma Interior Mod & Upgrade Ideas

    10 Awesome Toyota Tacoma Interior Mod & Upgrade Ideas

    If you've spent time on our site or in the forums, you know that there are so many different ways to customize your Toyota Tacoma. A lot of the popular mods happen to the exterior of your truck... obviously, t exterior is what everyone will see, but the interior is where you spend more of your time. In this post, I want to highlight ten, awesome Tacoma interior mods / accessories that you can quickly, and in most cases, affordably make to your truck.

    TRD Pro Shift Knob

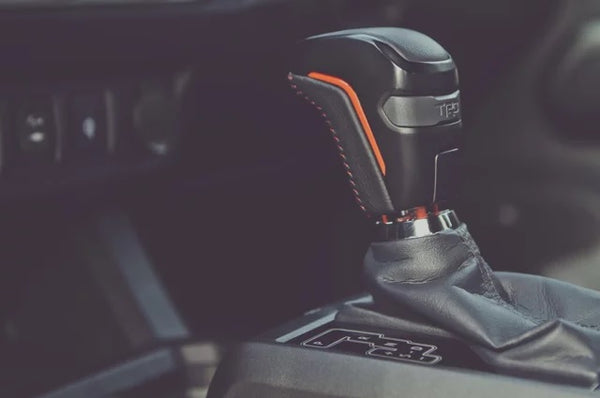
    If you have an automatic Tacoma, one of my favorite interior mods is the TRD Pro shift knob. The shift knob is the first and last thing you touch when driving, so stand out from the crowd and get something unique. It’s fast and east to remove the stock one, and there are plenty of after market options. You can buy it here.

    Clazzio Leather Seat Covers

    Seat covers not only help protect your seats, but they add a unique style. You can go the cheap route and get some basic ones that simply slip over your seat. While they protect the factory material from dirt, they generally are not form fitting and that baggy appearance is not attractive. Clazzio Leather Seat Covers makes custom fitted seat cover in a wide array of colors and materials. They offer a great warranty and they are made to not interfere with your side airbags. You can buy them here.

    Husky Floor Mats/Liners

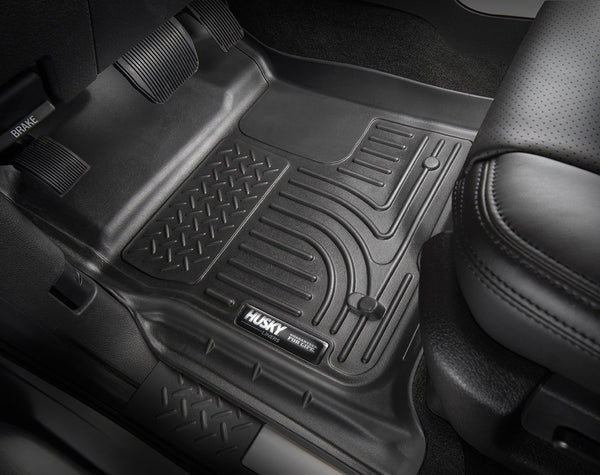
    The factory floor mats that come with your Tacoma are okay and get the job done most of the time, but you really want something durable and comfortable. A lot of aftermarket options are either one or the other. Husky Liners is the best of both worlds with a soft, yet durable material the fits perfectly in your truck. Husky also offers a selection of mud flaps and bed liners as well. You can buy them here.

    Floor Mat Fasteners

    As you know, the stock floor mats aren't secured to the floor, except for the drivers side. If your mats end up everywhere, a good upgrade would be the Eagle Klaw Floor Mat Fastener. This simple device requires no modifications to your truck, but keeps your mat secure. Better grip isn’t only for convenience, but safety too. You don’t want your mat sliding under your pedals. You can buy them here.

    Interior LED Lights 

    LED lighting is the way to go: they last longer, are brighter, and give a modern look and feel to your ride. For around $40, you can upgrade not only your map and vanity mirror lights, but also your license plate and the rear middle light. The swaps are easy to do, and you’ll probably never have to buy bulbs again.

    Here's a good thread on Tacoma World that will tell you what you need.

    AC Vent Decals

    Some people like chrome, some people don’t. If you have a 2016 – 2019 Tacoma, you are stuck with a chrome ring around your AC vents. Our matte black Tacoma AC vent decals offer a sleek, blacked-out look. You can buy them here.

    Door Sill Decals

    Our Tacoma door sill decals take the boring black lettering in your sills and make them pop with a color of your choice. The kit comes with decals for all four doors. You can buy them here.

    Glove Box Decals

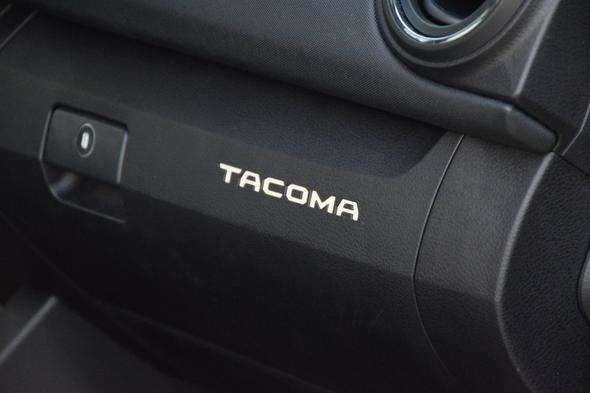
    That same problem will be on your glove box, so we give you the ability to have your lettering pop with our Tacoma glove box inserts as well. Since they can be a little tricky to install, we give you two sets in the kit. These are all great inexpensive upgrades to your interior. You can buy them here.

    A/C Current Plug

    This next one requires as little bit of work, but is probably one of the most helpful upgrades. If you want an A/C current plug in your truck, Tacoma World offers a great article about how to do it. With a couple cuts and a little bit of wiring, you can not only have an outlet at the rear of your center console, but you can have it run in 400w mode consistently instead of switching to 100w when you shift out of park.

    Stereo & Sound System

    Aside from your seat and steering wheel, probably the most commonly used part of your interior is the radio. In a previous post, I covered the best ways you can upgrade your stereo for under $300. I encourage you to check that out here: Upgrading your Toyota Tacoma stereo for under $300.

    All in all, there are so many things you can do to upgrade your interior. It all comes down to your style and budget. 

    * Please note that some of these links are Amazon affiliate links and we make a small commission if you purchase the product.

    Image Credits:

    Shift Knob - Elmore Toyota TRD Parts

    Husky Mats – Auto Accessories Garage

    Clazzio

    Eagle Klaw

    Outlet – Tacoma World user “djembefola”

    How To Upgrade Your Toyota Tacoma Sound System For Less Than $300

    How To Upgrade Your Toyota Tacoma Sound System For Less Than $300

    Standard sound systems direct from the factor have been getting better and better as time goes on. However, if you own a third gen Toyota Tacoma, you know that your stereo leaves quite a bit to be desired. For many, it’s more features, cleaner sound, more low end, or more dynamic range. If you own a 2016, 2017, 2018 or 2019 Tacoma and are in the market for a new sound system, there are plenty of options that won’t break the bank! Let's jump in...

    Before we get started, here are some common audio terms, just so we can all be on the same page.

    Amplifier/Amp: The unit that powers the speakers in your car

    Driver: The main part of a speaker that projects certain frequencies of sound

    Tweeter: The driver responsible for the higher pitched sound

    Sub Woofer: The driver responsible for the lower sounds

    2 Way Speaker: This means the speaker has two drivers, and two way is generally a high driver (tweeter) and a mid driver

    3 Way Speaker: This has three dedicated driver (high, mid, and low) – each driver is responsible for the respective band of frequencies

    Head Unit: The device you directly interact with (radio, CD player, etc)

    What to Replace and Why

    The tweeters in the Tacomas are known to be on the weaker end. Upgrading them will lead to a more crisp sound with more clarity in the high end. Some folks over at Tacoma World recommend these Subaru tweeters. While you can shop around for cheaper ones, it could also be best to go with what’s tried and true by your fellow Taco drivers. A crisper high end will really make the sound come alive.

    While the factory system can bring you loud low end, it isn’t exactly clear. Factory speakers, while better then they have been, are designed to focus most on the mid frequencies of sound (not the best on the highs or lows, but best in the middle). Getting a more full range speaker can produce a richer low end, without having to invest in separate subwoofers.

    If you don’t want to go through to process of making extra holes and whatnot for sub woofers, you can easily get a better sound by replacing your front and rear speakers. Front speakers are generally more responsible for the mids and highs, while the rear speakers are generally more responsible for mids and lows.

    Decent speakers are actually relatively inexpensive, and as long as you get ones that match the same power as you factory ones, they are completely plug and play. You can find out how many watts your factory speakers are with a quick Google search. Only a few parts and panels have to be taken off to access them.

    Cructhfield is one of the best websites when it comes to finding speakers that fit your ride. All you have to do is enter your year, make, model, and trim level, and it you will give you exactly what speakers are plug and play, and if they are not, it will match the hardware you need as well. The prices are generally low too, but you can always do a search on Google for the same speakers it shows.

    Some guys over at Tacoma World have had good look with these Kicker 6”9” speakers in the front and these Kicker 6.75” speakers in the rear. The front speakers are Just under $100, and the rear ones are just under $70. If those options are too expensive for you, there are plenty of other options.

    Sound deadening is something you also may want to consider. Sound deadening material keeps the road noise out, and the good noise in. Why is that important? Sound waves reflect and travel. This why you hear reverberation in your voice when you enter a bathroom, but not so much in your carpeted bedroom. For some extra money, you can invest in some sound-deadening mat to put inside your doors and behind your rear speakers. This will help you achieve and richer and warmer sound in your music, and help keep some of the roar of your mud tires out.

    At this point, you’re looking about $250 for a life changing sound. All of this can be achieved with the stock head unit. But what if you want more options? While the stock Toyota Tacoma head unit on the newest trucks are pretty nice, the older ones can get sort of basic.

    Head Units

    If you want better EQs, touch screens, iPhone cables, and more, you may want to consider a new head unit. While you DO NOT need to do this when you get upgraded speakers, you can. This will up your cost too, and you will be over the $300 amount. So, consider this a bonus section.

    Let’s take a look at four options:

    Alpine iLX-F309

    Alpine ILK-107

    Kenwood DDX6704

    Pioneer AVH-W4400NEX

    Just as a disclaimer, head units are not usually plug and play. You usually have to take quite a bit of the dashboard apart, and sometimes you have to do some custom wiring with specific harnesses. There are plenty of experts out there who do this stuff for a living, so keep that in mind.

    The Alpine iLX-F309 is currently the most expensive of the group at just under $870. It comes full with plenty of features: HDMI input, works with Apple and Android, SiriusXM ready, USB playback, Bluetooth, 9 band parametric EQ, iDatalink connectivity, a camera input, and more. While it can fit in more vehicles with the smaller unit size, that means the 9 inch display sticks out and hovers. If you can deal with that and the price, it does everything you would need it to.

    For about $200 less, you can get the Alpine ILK-107 for just under $680. It offers most of what the iLX-F309 offer but is flush fitting with a 7 inch screen. This unit has many positive reviews and seems to be a favorite amongst truck owners.

    At just around $330, the Kenwood DDX6704 is the least expensive of the bunch. The 6.8 inch flush fitting screen comes with Apple and Android compatibility, camera inputs, navigation, Bluetooth, and more. Some of the reviews are not pleased with the Bluetooth and navigation, but overall, most people are happy with it. If you are looking for a less expensive touch screen to replace your buttons and knobs, this could be the option for you.

    The Pioneer AVH-W4400NEX is packed with the most features and is around $540. The 7 inch, flush fitting screen has WiFi, Bluetooth, SirisXM ready, back-up camera ready, iDatalink, 13 band EQ, USB and SD card playback/input, fast USB charging port for Android, HDMI input, and more. If you are looking for every option you can think of, this may be for you. 

    Make your System Yours

    Your sound system has almost limitless options for customization. You do not need to break the bank to do it. For less than $300, you can make an entirely new sounding experience in your Tacoma.

    I would like to share some expert advice though. You can spend thousands of dollars on your sound system, but if you play low quality music back, it’s going to sound bad. Thankfully music downloads have come a long way from the days of low quality .mp3 files, but some of them still exist, and you may be listening to them. Your best formats would be uncompressed formats like .wav (CD quality) or certain compressed formats like FLAC. This is a topic for a whole different post, but basically don’t listen to those old .mp3 tracks your downloaded off Limewire. Good speakers let high quality music sound good, but can’t make low quality stuff sound any better.

    Image Credits

    Sound-Deadening – Tacoma World forum user drscott11

    * Please note that some of these links are Amazon affiliate links and we make a small commission if you purchase the product.

    The Ultimate Guide To Toyota Tacoma Tonneau & Bed Covers

    The Ultimate Guide To Toyota Tacoma Tonneau & Bed Covers

    Regardless of how you use your Tacoma, trucks were made to carry things. Sometimes you want your stuff covered, or many you just like that sleek design of a covered bed. Either way, there are plenty of options to cover your Taco’s bed. Let’s take a look at some of them.

    TONNEAU COVERS

    These covers are one of the most common types of covers that you will find on a truck. A tonneau covers are either hard or soft covers designed to protect unoccupied areas of a car, or in our case, the bed of a pickup. There are quite a few types of tonneau covers.

    Snap

    The most basic cover that you can get is just one piece of material that fits to your bed, and snaps into place. These are great if you’re on a budget. While they generally are not the most durable, they get the job done. The can bed a flexible piece of material that you can fold in any way you like, or they have some type of firmer piece. Those limit how much you can open them, and they basically work best either on or off, not so much in between, but they offer more rigidity.

    Pros: inexpensive, easy to install

    Cons: lacking rigidity, generally not the easiest to take off/retract when needing full access to your bed

    Trifold

    This is going to be one of your cheaper options for tonneau covers. They are exactly what they sound like. They are a soft cover that lies over your bed, and to pull it back, it folds into three sections. You can generally pick these up for around $300 to $400. However, there are more expensive ones for closer $1000.

    Pros: Inexpensive (sometimes), easy to install, full bed access

    Cons: Sometimes inferior quality and fit (on less expensive ones), soft material may cause pooling water

    Gator makes a popular tri-fold. It’s basis, yet durable. The lightweight construction makes it easy to fold, but the large locking tabs keep it in place when you want it down. The price is on the lower end too, so it makes it more appealing too. Here is a link to the Gator Tri-Fold, but make sure to get the right size for your truck. BTW - this is what I have and it works great!

    Rolling/Revolving

    Rolling covers are a good option for a fast retracting option. Like tri-folds, they are easy to install, and are a cost effective option, though you can find more expensive versions. With the nature of whey are, they will be made out of soft material, which could be prone to wear tear. You can get higher prices ones that are made of aluminum, and that could prove to last longer.

    Pros: Easy to install, can be inexpensive, full bed access

    Cons: Prone to rips if soft 

    BAK Industries makes some good stuff. Their covers are durable and highly rated. While their Revolver X4 is a little on the high end when it comes to pricing, it is a good option to choose from if the want easy use and protection.

    Retractable

    These operate similarly as the rolling ones, but they roll/retract down. These are going to be on the higher priced side, and they take up a bit of bed space in the back. However, they are very fast and easy to retract. Electronic ones exist, and they make things easier, but keep in mind that the more moving and electronic parts you have, the more things can go wrong over time.

    Pros: East to retract

    Cons: Expensive, take up bad space

    Roll-N-Lock is one option of a durable and easy to use retractable cover. It locks well, and it made out of aluminum with vinyl to ensure durability. 

    SHELL COVERS

    These hard covers are deigned to give you rugged protection. They can also be color matched to your truck to give a nice sleek look. These can either fit flush to the top of your bed, or be raised to meet your roofline. These are generally made out of fiberglass don’t come off to easily. They are more “permanent” or long-term installations.

    Camper Shells/Caps

    These offer the largest covered area for your bed. They generally match up with your roofline, and are painted to match your truck. They come with windows, and are generally made out of fiberglass. They are great for keeping a large amount of stuff out of the elements. The biggest downside is that you can move cargo in and out through the tailgate. There is no access from the sides. These have a wide range of prices, but generally are on the higher end of the $300 to $1000.

    Pros: large amount of surface area, excellent security from the elements, color matched

    Cons: only one point of access, not quick to remove, generally more expensive

    Flush Shells/Hard Tonneau

    While the camper ones meet your roofline, these sit flush, or right above your bed. They can be color matched to your truck, and they really add a sleek and complete look to the back of your truck. While they are durable, they aren’t the most practical if you toss a lot of stuff in your bed. While they generally hinge open to allow more access, then most practical point of entry is the tailgate. These are around the same price as the camper shells, but can cost a little less.

    Pros: durable, color match

    Cons: limited access 

    THINGS TO KEEP IN MIND

    Now, there are outliers to everything. For example, there are covers that really stand out from the rest. Peragon makes a retractable cover that is not only quick to retract, but quick to remove completely should you need the full bed. There are some rolling covers that are soft material, and some that are aluminum. There are expensive versions of each cover listed, and some that are expensive.

    It all depends on your budget, and what you want out of it. Do you want t show vehicle, or do you need an off-roading beast? Perhaps you need both. This is a guide I put together for you from one Tacoma owner to another, but it’s just a guide. Find what works for you!

    * Please note that some of these links are Amazon affiliate links and we make a small commission if you purchase the product.

    Image Credits:

    Tri Fold – Courtesy of Gator

    Snap – Courtesy of Tonneau Cover World

    Rolling – Courtesy of CJ Pony Parts

    Retractable – Courtesy of Suspension Connection

    Camper Shell – Courtesy of Tom’s Camper Land

    Flush Shell – Courtesy of Tom’s Camper Land

    How To Change The Oil On A 3rd Generation Tacoma

    How To Change The Oil On A 3rd Generation Tacoma

    For anyone who's owned a vehicle, you've probably learned by now that it’s generally cheaper and easier to perform routine maintenance yourself, than taking it to the dealer or the local Jiffy Lube. This includes a long list of things, especially, changing your engine oil.

    Changing your oil is one of the most common DIY vehicle owning experiences. One thing I learned after I blew through my 25,000 miles is that changing the oil on a third generation Tacoma is a little different than other vehicles i've owned in the past, and there are a couple things you need to be aware of. Let's dive in!

    Here’s what you'll need to get the job done:

    • Oil (0W20, 6.2 US quarts with oil cooler, 6.1 US quarts with out oil cooler)
    • Oil filter (with gaskets and o-rings)
    • Ratchet and 14mm socket
    • Torque wench (for best results)
    • Oil filter wrench
    • Oil filter cap drain tool (generally comes with your filter)
    • Oil pan (for catching the draining oil)

    After you have what you need, get started by removing your skid plate. This is needed to access your oil filter. After that’s off, put your drain pan under your drain plug. Loosen your plug, and be prepared to move your pan to catch the oil. After the oil is drained, put the drain plug back in with a new gasket. Torque it down to 40 Nm / 30 ft/lbs.

    Now it’s time to remove the filter housing, and replace the filter. The housing is plastic, and many owners choose to replace the stock plastic one with an aftermarket aluminum one. The aluminum one is more durable and will last longer. While the skid plate will protect it while the truck is moving, it could be damaged during oil changes. You can get an aluminum one here.

    First, remove the drain plug from the oil filter cap. This will expose where you screw in your drain tool. Once you thread it in, oil will drain. You don’t need to drain this oil before removing the housing, but it will make the process cleaner, as oil will start to flow in all directions one you start to loosen the housing.

    Next, take your wrench and place it over the housing. You may need to use a breaker bar to remove it from the engine if it has been over-tightened. Once removed, remove and discard the old o-ring and oil filter. It’s best to clean the cap and threads to avoid dirt building up. Install your new o-rings and filter. Thread the cap/housing back into place by hand. Tighten the housing down with the wrench to 25 Nm / 18 ft/lbs. Thread the housing drain plug back in with a new (and lightly oiled) o-ring, and torque it down to 13 Nm / 10 ft/lbs.

    After that, add new oil. You will use 6.2 US quarts of 0W20 if you have the oil cooler, and 6.1 US quarts with out oil cooler. Start your engine and check for leaks. Check the oil level with your dipstick, and top off if needed. After you’re done, replace the skid plate, and you’re good to go.

    Changing your oil on your truck may have a few more steps over a conventional one-piece disposable filter, but it’s still pretty straightforward. In the event you are more of a visual learner, here is a good video that covers everything from start to finish. Remember that oil is the life of engines, so keep your Taco running well, and treat her right.


    * Please note the following:

    This guide is accurate for all the following third gen models: 2016, 2017 and 2018.

    Some of these links are Amazon affiliate links and we make a small commission if you purchase the product.

    Images Credits:

    Oil Filter Housing – Tundra Solutions user Jowett Engineering

    Exploded Filter Diagram – Posted by Tacoma World user tubesock